Tuesday, 17 April 2012

chinese-sticky-pork

c h i n e s e - s t i c k y - p o r k
Last night I had taken some pork steaks out of the freezer in an attempt to use up the vast quantities of frozen meat which reside there. As my day at work wore on I couldn't really think what to do with the pork steak...partly because I didn't really know what I was looking for and partly because I couldn't think what I had in my cupboards, I really struggled to find a good recipe for pork on the internet (I'm absolutely sure they exist though). 
So I decided to have a go at putting some of my favourite flavours in the same bowl and seeing what I could produce!!
The results were surprisingly delicious (and really, really simple)... I give you Chinese-style sticky pork with paprika and coconut rice.


So for the recipe:
2 pork steaks; 2 tablespoons honey; 1 'glug' (technical term!) soy sauce; 1 tablespoon sesame oil; 1 teaspoon chilli flakes; 2 chopped spring onions; 2 teaspoons paprika.
1 red onion; large handful baby corn; 2 chopped spring onions; 1 tablespoon honey;  half a tin chopped tomatoes; 1 handful coriander;
Brown rice; sesame oil; 2 tablespoons dessicated coconut; 1 tablespoon paprika
Mix all of the ingredients together to form a sticky paste, add a little more soy sauce or sesame oil to form a marinade and cover the pork steaks in it and leave for a while (overnight would be great but I only had half an hour!) Meanwhile cook your rice, drain and leave to the side.
Once your steaks have marinaded heat up your frying/gridle pan, brown the onion and, whilst the pan is very hot, place your steaks in the pan. Cook for around 5 minutes on one side, pour the rest of the marinade in and turn the steaks over to cook through. Place your steaks on a chopping board, cut into slices and return to the pan with the baby corn, spring onions, honey, coriander and chopped tomatoes. Cook until most of the liquid has been cooked off and the honey is turning everything sticky and delicious.
In the same pan (once the content has been moved into a bowl) heat some more sesame oil. Add the rice, paprika and coconut and continue to stir this until everything has been mixed together, the coconut is starting to smell delicious and the rice is cooked through (if you're finding the rice is starting to dry a little you can add some coconut milk or a bit more oil to keep it moving).

Serve with some extra coriander and a few more chopped spring onions.

Paprika and coconut rice


Friday, 30 March 2012

brilliant-baking-day

b r i l l i a n t - b a k i n g - d a y
I thought I'd post quickly and give you a taster of what I've been up to.
For Christmas my parents got me a practical class at Martin Wishart Cook School which I cashed in yesterday, learning to make 5 different desserts and ultimately having an amazing day. It really was worth using one of my holidays to spend a day in a kitchen and as well as getting some inspiration for new recipes, meeting some lovely people and getting taught some new techniques I also realised that my experiences in the kitchen are so much more pleasant when you have a kitchen porter weighing out all your ingredients and cleaning up after you... It's aspirational at least!!

One of the desserts on the menu was a blueberry bakewell tart and, because I remembered to take photos of it during the baking process, I thought I would share it just now!!

blueberry bakewell tart - pre baking
So for the recipe:
Pastry: 70g butter; 60g icing sugar; 1 egg; 200g plain flour
Frangipane: 250g butter (softened); 250g icing sugar; 250g ground almonds; 100g plain flour; 4 eggs
Final touches: Fresh blueberries, flaked almonds; blueberry jam

P a s t r y : Place butter, flour, icing sugar and a pinch of salt into a bowl and rub together with your fingertips until it forms breadcrumb consistency.
Beat the egg into the flour mix. Knead the mix gently until it forms a ball. Wrap in cling film and leave to rest in the fridge.
F r a n g i p a n e : Sieve the icing sugar into a bowl with the butter and beat together until white and creamy. Fold in the ground almonds and the flour. Beat the eggs into the mix one at a time until incorporated well and beat again for a further 3 or 4 minutes.
F i n a l - t o u c h e s : Butter and flour a 30cm flan ring. Roll out the pastry to 5mm thickness and place onto the ring pressing it into the corners. Prick the base with a fork. Evenly spread blueberry jam onto the base. Spoon the frangipane mix into the flan and spread evenly. Scatter the blueberries and flaked almonds on top of the frangipane and bake at 190 degrees for 20 minutes.

Serve with creme fraiche or just eat the whole thing between you and 3 friends in approximately 15 minutes!

More of my Martin Wishart day will definitely follow as I try to make the rest of my menu by myself!!

blueberry bakewell tart - pre eating!

Saturday, 11 February 2012

sausage-hotpot

s a u s a g e - h o t p o t
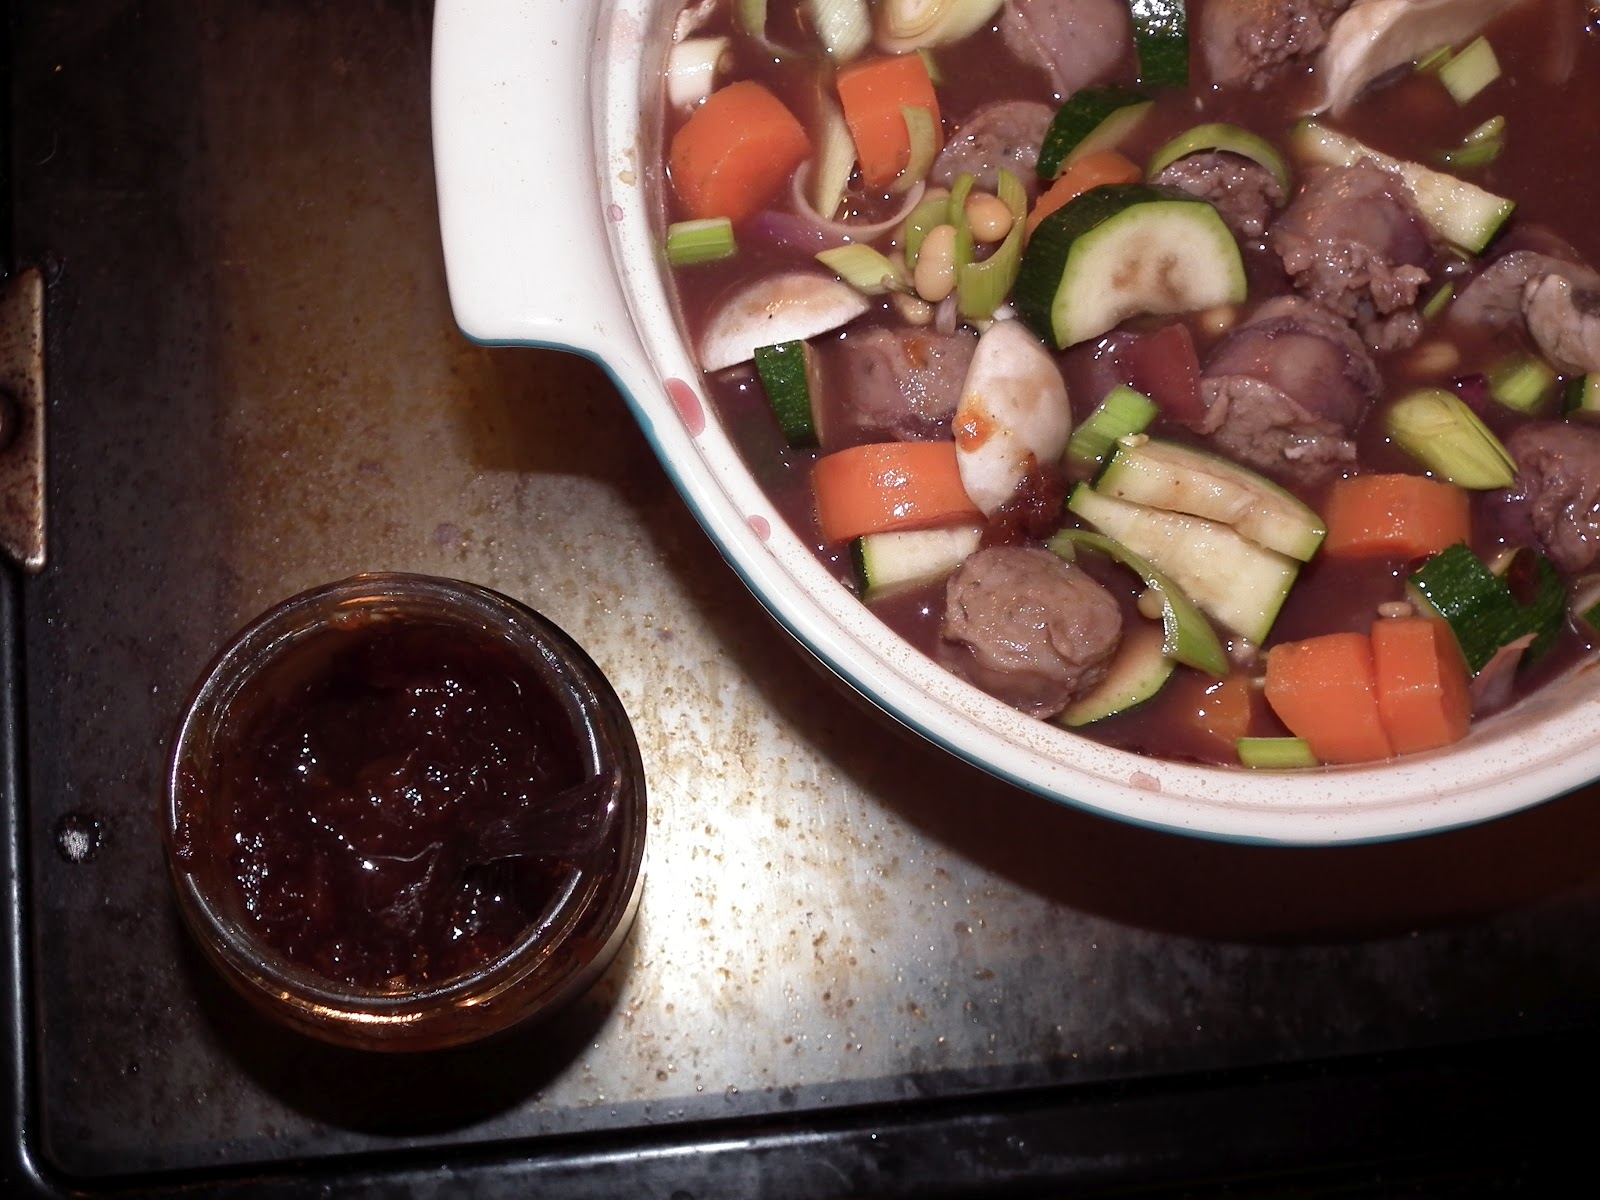
I bought a brilliant turquoise casserole dish with a lid last year which looks perfectly at home in my kitchen. It usually sits on a shelf surrounded by my cute little, charity shop bought, cups & saucers and my mum's old milk jug... but that's not really the point of it I suppose! After deciding I should do more cooking with it (and mostly because I realised I had sausages needing used up), a sausage hotpot seemed like an obvious choice!


So for the recipe:
6 sausages of your choosing (I used pork & red onion sausages but it definitely works with Quorn sausages too); 2 carrots; 1 leek; 1 courgette; 4 chestnut mushrooms; red wine (some for cooking, the rest for drinking); chutney; red onion; Worcestershire sauce; tin of baked beans.
Cook the sausages in the casserole dish with a chopped red onion, 200ml (ish) of red wine, a 'glug' of Worcestershire sauce and 2 tablespoons of chutney. Whilst the sausages are cooking, parboil the carrots and have a glass of wine. After about 20 mins of the sausages cooking, cut them into smaller chunks and add the remaining ingredients (chopped leek, parboiled carrots, chopped courgette, sliced mushrooms, baked beans). At this point I added a little water and another tablespoon of chutney - because it's just so tasty. Cook on a lower heat (about 120) for a further 30 minutes until everything is bubbling away in the casserole dish.


I served it with mashed potatoes (which I mash with olive oil & a tiny bit of paprika to give them a deep, nutty taste with a bit more colour) and I'll admit the portions were slightly out of control...the recipe would comfortably serve 4 but it seemed to be finished by the two of us!!

Sunday, 1 January 2012

winter-cakery


w i n t e r - c a k e r y
Like a grit bin, I'm made for winter really. A 'Celtic' transparent & freckly complexion lends itself well to being wrapped up in a hat and coat on winter nights with the steam of a cup of mulled wine keeping me warm!

Warm, spicy and tasty are the results I aim to produce when I bake during Winter.
I can throw together a Marieke Cake pretty quickly & add a dusting of icing sugar with some Christmas-related greenery in the middle. Alternatively, I cook some gingerbread biscuits. Gingerbread biscuits are so easy to make in all different sort of shapes and sizes (man/woman/star/heart/bell).


So for the recipe (which makes about 30 decent star shapes):
350g plain flour; 1 tsp bicarbonate of soda; 3 tsp ground ginger; 1 tsp cinnamon; 125g butter; 175g brown sugar; 1 egg; 4 tbsp golden syrup
Mix the flour, bicarbonate of soda, ginger and cinnamon (or other spices) into a bowl. Add the butter and blend together until the mix resembles breadcrumbs. Stir in the sugar.
Gently beat the egg and syrup together and add the the dry mix until combined. Tip the dough out and knead it until it had turned smooth. Wrap it in clingfilm and leave to chill for 15 minutes.
Roll out the dough to a £1 coin thickness and use cutters to cut out your gingerbread shapes. Place on a baking tray and bake for 12 minutes at 170 degrees. Transfer to a cooling rack once cooked so they can begin to harden.

Tuesday, 11 October 2011

plenty more fish...

p l e n t y - m o r e - f i s h . . .
I was told by a former colleague that salmon is too common and, in many ways, I think I agree; Every restaurant you go to now has at least one salmon dish but I don’t think this is necessarily a bad thing. I am aware there are plenty more fish in the sea, metaphorically and literally I suppose, but I really do love salmon (particularly a giant bit of smoked salmon if anyone is thinking about a good Christmas present).

 
My Dad is brilliant when it comes to flavour combinations; He has great taste in wine and is my kindred spirit when it comes to sharing a giant pot of raw garlic in oil and polishing off a kilo of Roquefort in 20 minutes! And as much as garlic, wine and French blue cheese feature heavily in his (and my own) life he also creates some other amazing concoctions in the kitchen - one incredible salmon recipe in particular which he has shared with a few people, and it now comes recommended by their local fish man (someone who, I imagine, is not like this...)!

Salmon in marinade

So for the recipe:
For the marinade – 1 ‘glug’ soy sauce; 1 tbsp balsamic vinegar; 1 ‘glug’ white wine; 3 cloves of garlic, thinly sliced; 4 chopped spring onions; ½ inch ginger, finely sliced; ½ chilli, finely sliced.
For cooking – 1 ‘glug’ white wine; 1 tbsp olive oil; 2 tsps honey; 1 tsp dried tarragon

Cover the bottom of a dish with the soy sauce then add the other marinade ingredients. Place the Salmon steaks on the marinade with the skin side up, cover and place in fridge for at least 6 hours.

Cover the bottom of a dish with olive oil, remove the salmon from the marinade and place skin side up in the dish and rub some olive oil on the skin. Cover with tin foil and bake for 25 to 30 minutes at 180C.
Pour the left-over marinade into a pan, add another glug of white wine, some olive oil & slowly heat the mixture. When hot add 2 tsps of honey and keep stirring until the honey is dissolved. Add a teaspoon of dried tarragon and let mixture simmer until reduced slightly.
When the salmon is cooked, serve with the cooked marinade mixture poured over the top. I usually serve it with spring onion & crème fraiche mash and a glass of the remaining white wine which seems to compliment it pretty well!

Eat Mair Pie is a lovely recipe blog which has my dad’s salmon recipe on it too.
And Vince – maybe have a go with this salmon recipe...it’s not that common and "Hugh’ll" probably be impressed!!

Baked salmon with 'nomathon' mash

Tuesday, 5 July 2011

recipes

r e c i p e s . . .
The last time I followed a recipe exactly I think I was doing a badge for Brownies and needed to make meatballs – I don’t believe it was a meatball-specific badge, probably just a cookery badge!
The whole meatball-making process started after school about 4pm and the food wasn’t on the table until 6.30pm! By this time I had to go to Brownies so I think I had a jam sandwich for my dinner that night (which tasted much better than my attempt at meatballs)! My unlucky brothers were the recipients of what was probably described as “another one of Laura’s cooking attempts” ... around the same time I burnt potatoes when boiling them, couldn’t use a tin opener and tried to pass off porridge oats and raisins as home-made muesli!

Things have progressed since then, I learnt to follow recipes and then I learnt not to follow recipes.
For me, there are times I need to follow recipes – making pastry
And there are times when I don’t – making anything other than pastry

As a Disney pirate once said “the code is more what you’d call ‘guidelines’ than actual rules” and this is perfectly applicable to recipes too!

So substitute away, probably within reason, and if you need any more encouragement to ditch the coriander* and try something different then have a look at The Flavour Thesaurus. It’s an inspired book about flavours that go and flavours that contrast & compliment. Really well written and easy to reference if (like me) you don’t have everything in your cupboards that a recipe suggests. 
*NB – I would like to take a moment to point out that I don’t have anything against coriander as an ingredient in recipes!

Monday, 4 July 2011

pistachio-joy!!

p i s t a c h i o - j o y ! ! . . .
Now I’ve showed you what I think are my standard cakes (carrot cake, vegan chocolate cake, Marieke cake), I can move on to my favourite cake...
I could eat an entire one of these cakes in one sitting....partly because I love cake but mostly because I LOVE pistachios!! It would make more sense for me to just eat a bag of pistachios but it’s not really the same!!
The most laborious part of making this cake is shelling the pistachios so you should either put some time aside to do that or get some recruits (even Niall helps with shelling pistachios for this one and it’s rare that he will help with anything baking related given there is no reward for him – he doesn’t really like cake...I know, weird!!).

I'm surprised there are pistachios left on the top!


So for the recipe:

125g butter - soft; 175g caster sugar; 3 eggs – beaten; 125g plain flour; ½  tsp baking powder; 100g(ish) pistachio nuts – chopped; 1 lemon – juiced & zested
Cream together the sugar and butter until fluffy. Beat in the eggs one at a time. Add in the flour & baking powder. Stir together until combined. Stir in most of the chopped nuts and finally add in the lemon juice & zest.
Bake at Gas Mark 4 for 20 – 30 minutes, until the top of the cake is golden and it bounces back up when you press it gently.

To ice it I just sprinkle it with some icing sugar – you really don’t need anything more than that...the pistachios do all the work.

I did once end up with hardly any pistachios in my cake as I’d eaten so many in the baking tasting process. I tend to cook with some at the side now!!